Web-Available Aircon Control: Difference between revisions
mNo edit summary |
No edit summary |
||
| (19 intermediate revisions by 2 users not shown) | |||
| Line 1: | Line 1: | ||
A component of the [[Sensors and Controls @ DILC]] Project, Web-Avaiable Aircon Control is a prototype aircon remote sensor controllable via Web. | |||
__NOTOC__ | |||
==Components== | |||
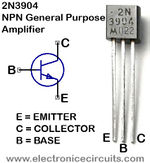
* 5 pcs. Transistors (2N3904) | |||
| Line 20: | Line 12: | ||
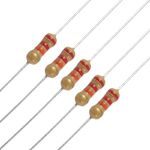
* 5 pcs. Resistors (22K ohms) | |||
[[File:Resistor | [[File:Resistor final.jpg|150px]] | ||
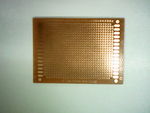
* PCB | |||
[[File:PCB.jpg|150px]] | [[File:PCB.jpg|150px]] | ||
* Breadboard | |||
[[File:Breadboard.jpg|150px]] | [[File:Breadboard final.jpg |150px]] | ||
* Wires - "Solid and Stranded" | |||
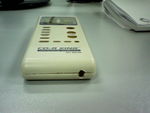
* CD-R KING Universal Remote Control | |||
[[File:Remote Control.jpg|150px]] | [[File:Remote Control.jpg|150px]] | ||
* Arduino Micro | |||
[[File: | [[File:Arduinomicro final.jpg|150px]] | ||
| Line 57: | Line 49: | ||
'''Schematic Diagram:''' | '''Schematic Diagram:''' | ||
[[File: | [[File:Schematic_Diagram.jpg|900px]] | ||
==Important Steps== | |||
* On the board of the remote, you will see black prints. These prints are very thin so do not try to solder on them because you might destroy the connections. Try to sketch the black prints, then connect the surface with other black prints as seen in the documentation. (The black prints can be connected by the means of green thin lines connecting them. Try to follow the green lines from the black print chosen, and it will lead to other two or three black prints.) | |||
* The needed controls here are ON/OFF, UP, DOWN. If you will notice, this buttons are functioning on the two close black prints. Those black prints are needed to be controlled, so they must be connected to Arduino. There are only five black prints needed, so we will need only five wires to be soldered. We will solder only the green wires attached to the black prints needed (the green wires are insulated. To erase its insulation, use a sharp thing to erase it and be careful). Solder only the bronze part where the insulation is erased. Be careful when soldering the bronze part, for when you pull it too much, the connection of the bronze will be destroyed. The combination of the left part from “Mode to “Set” is 3,9,6,11,10,11,3,11,10,5,6,5. The right part from “Power” to “Temperature Down” is 3,5,6,9,10,9. | |||
* Get the Breadboard and mount up the transistors, resistors, and wires. The transistor is NPN. Search for the pin configuration of the transistor (2N3904). The emitter(E) must be connected to the Ground(Gnd), Base(B) connected to the resistor, Collector(C) connected to the remote control. There are five sets of transistors needed here. | |||
* To connect the breadboard to the Arduino Micro, connect the Ground of the Breadboard to the ground of the Arduino, the resistors toward the PWMs of arduino. Arrange the connection of the wires from the remote to the transistor to the resistor to the Arduino. | |||
* Run the Arduino software and put in the codes below. Save and upload the code. Next is to create the PHP code (see its link below) in Gedit and save it as ".php". In the PHP code, the $comPort = "/dev/ttyACM2" can be seen. Edit this part by changing the comPort that can be seen in the Arduino. Save all the codes and try to run the application. | |||
==Arduino Code:== | |||
[[File:Arduino_Code.pdf]] | |||
==PHP Code:== | |||
[[File:PHP_Code.pdf ]] | |||
| Line 127: | Line 84: | ||
[[File:Remote PCB 1.jpg|250px]] | [[File:Remote PCB 1.jpg|250px]] | ||
[[File:Breadboard setup 1.jpg|250px]] | [[File:Breadboard setup 1.jpg|250px]] | ||
[[File: | [[File:Whole_setup_1.jpg|250px]] | ||
[[File:Whole setup 2.jpg|250px]] | [[File:Whole setup 2.jpg|250px]] | ||
[[File:Whole setup 3.jpg|250px]] | [[File:Whole setup 3.jpg|250px]] | ||
[[File: | [[File:Whole_setup_4.jpg|250px]] | ||
[[File: | [[File:Remote Schematic PCB.png|200px]] | ||
<br /><br /> | |||
==Development Team== | |||
* '''Elijah L. Lingbanan''' | |||
<br /><br /> | |||
==References== | |||
References | |||
"http://arduino.cc/en/Main/arduinoBoardMicro" | "http://arduino.cc/en/Main/arduinoBoardMicro" | ||
Latest revision as of 09:20, 7 May 2014
A component of the Sensors and Controls @ DILC Project, Web-Avaiable Aircon Control is a prototype aircon remote sensor controllable via Web.
Components
- 5 pcs. Transistors (2N3904)
- 5 pcs. Resistors (22K ohms)
- PCB
- Breadboard
- Wires - "Solid and Stranded"
- CD-R KING Universal Remote Control
- Arduino Micro
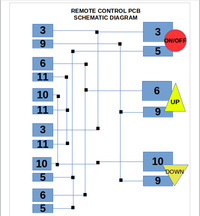
Schematic Diagram:
Important Steps
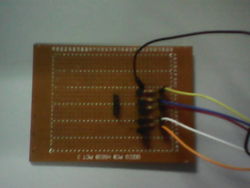
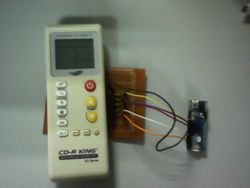
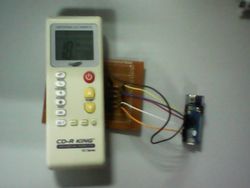
- On the board of the remote, you will see black prints. These prints are very thin so do not try to solder on them because you might destroy the connections. Try to sketch the black prints, then connect the surface with other black prints as seen in the documentation. (The black prints can be connected by the means of green thin lines connecting them. Try to follow the green lines from the black print chosen, and it will lead to other two or three black prints.)
- The needed controls here are ON/OFF, UP, DOWN. If you will notice, this buttons are functioning on the two close black prints. Those black prints are needed to be controlled, so they must be connected to Arduino. There are only five black prints needed, so we will need only five wires to be soldered. We will solder only the green wires attached to the black prints needed (the green wires are insulated. To erase its insulation, use a sharp thing to erase it and be careful). Solder only the bronze part where the insulation is erased. Be careful when soldering the bronze part, for when you pull it too much, the connection of the bronze will be destroyed. The combination of the left part from “Mode to “Set” is 3,9,6,11,10,11,3,11,10,5,6,5. The right part from “Power” to “Temperature Down” is 3,5,6,9,10,9.
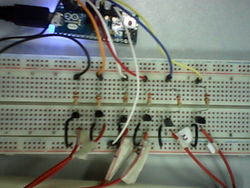
- Get the Breadboard and mount up the transistors, resistors, and wires. The transistor is NPN. Search for the pin configuration of the transistor (2N3904). The emitter(E) must be connected to the Ground(Gnd), Base(B) connected to the resistor, Collector(C) connected to the remote control. There are five sets of transistors needed here.
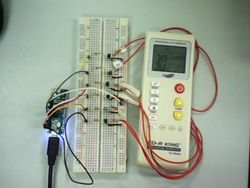
- To connect the breadboard to the Arduino Micro, connect the Ground of the Breadboard to the ground of the Arduino, the resistors toward the PWMs of arduino. Arrange the connection of the wires from the remote to the transistor to the resistor to the Arduino.
- Run the Arduino software and put in the codes below. Save and upload the code. Next is to create the PHP code (see its link below) in Gedit and save it as ".php". In the PHP code, the $comPort = "/dev/ttyACM2" can be seen. Edit this part by changing the comPort that can be seen in the Arduino. Save all the codes and try to run the application.
Arduino Code:
File:Arduino Code.pdf
PHP Code:
File:PHP Code.pdf
Other Pictures:
Development Team
- Elijah L. Lingbanan
References
 "http://arduino.cc/en/Main/arduinoBoardMicro"
 "http://www.instructables.com/id/Control-an-Arduino-with-PHP/?ALLSTEPS"
 "https://www.youtube.com/watch?v=ROBqcQ2YEB8"
 "http://www.instructables.com/id/Build-a-transistor-circuit-board-for-controlling-A/?ALLSTEPS"
See Also

