Media Broadcaster
Description
a Rasperry Pi-based appliance that broadcasts video or audio via DILC servers.
Materials
A. Audio Streaming
* Raspberry Pi (Model B)
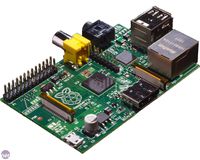

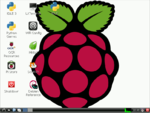
* SD Card with installed Raspbian "Wheezy" OS (Operating System)


* USB Sound Card


* Audio Computer Microphone


* USB Micro Cable with Power Brick (5 Volts, 2 Amperes)


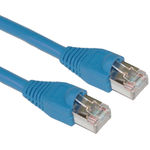
* Ethernet Cable

B. For Programming
  *PC Monitor
  *USB Keyboard
  *USB Mouse
  *VGA to HDMI Cable or RCA Cable
.jpg#.U3Vdg7VDsyY)
Procedure
A. Installing and Running the Rasbian Wheezy OS (Operating System)
- Use Win32 Disk Imager to write a boot image to your SD Card.
- Download the Wheezy zip file and extract the file.
- Insert the SD Card into your Raspberry Pi and write the disk image file using the installed win32 Disk Imager.
B. Setting Static IP
- Check first the set-up by
cat /etc/network/interfaces
then the line iface eth0 inet dhcp implies that the IP address is via DHCP which is dynamically registered by the router.This is what we want to change.
- Get Information
ifconfig
with these you will get the different information that we will use later such as:
inet address (Pi's Current IP Address)
Bcast (The Broadcast IP Range)
Mask (Subnet Mask Address)
then
netstat -nr or route n
(note that these commands will give you the same information)
Get also the
Gateway Address
Destination Address
C.Programming for the Audio Streaming
After installing and running the OS of your Raspberry Pi, you are now ready to program the audio streaming.
Open the LX Terminal,
- Install PulseAudio and these preference GUI with the command
sudo apt-get install pulseaudio
sudo apt-get paprefs
sudo reboot
- After the system being rebooted, next thing to do is to edit and add the following lines in the file /etc/pulse/daemon.conf by these command
sudo nano /etc/pulse/daemon.conf
lines:
resample-method = ffmpeg
default-sample-rate = 44100
alternate-sample-rate = 44100
after these save and exit by Ctrl+o and Ctrl+x
- To make the Raspberry Pi audio server appearing automatically in your "Sound Setting" on every client (PC) and the server (raspberry Pi).
sudo sed -i 's/AVAHI_DAEMON_DETECT_LOCAL=1/AVAHI_DAEMON_DETECT_LOCAL=0/g' /etc/default/avahi-daemon
- Activate the network feature of PulseAudio on both client and server.
paprefs
For the server mark the following boxes
Network Server -Enable network access to local sound devices
Network Server -Allow other machines on the LAN to discover local sound devices
Network Server -Don't require authentication
For the client you want to stream from the server (Raspberry Pi)
Network Access -Make discoverable PulseAudio network sound devices available locally
- Reboot the both server and the client by:
sudo reboot
After the system rebooted the Sound Setting should appear like these:

- To check if the streaming is working plug in the Computer Audio Microphone in the USB Sound card and start to talk. note that there will be a delay of 1000ms-2000ms.
Project Team
- Catherine Bagotsay (developer)
- Dawn Benigno (consultant)
- Dan Villareal (consultant)
- Peter Sy (consultant)
References