How to Create a Site: Difference between revisions
| Line 32: | Line 32: | ||
------------- | ------------- | ||
==See Also== | ==See Also== | ||
<br> | |||
* [[Pages.UPD|Pages.UPD]] | * [[Pages.UPD|Pages.UPD]] | ||
<br><br> | |||
[[Category:Tech Support]] | [[Category:Tech Support]] | ||
Revision as of 15:29, 8 January 2014
Create a Site on Pages.UPD
1. Go to Pages.UPD site
2. You can access the site using your upd webmail account.
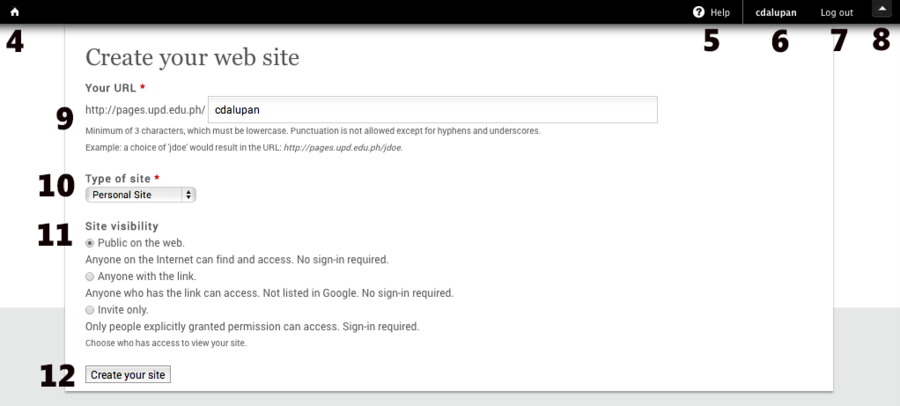
3. Once you've logged in, click the CREATE image for site creation.

4. Home Icon - This icon redirects to homepage
5. Help - This link helps the user for various topics on how to use pages.upd
6 Profile - The user can view or edit his/her account details
7. Logout
8. Hide/Show Navigation
Site Configuration
9. URL - You can set your site's URL.
10. Type of Site- There are three type of site to choose from:
- Personal Site - Used for personal sites only (portfolio, bibliography, CVs)
- Project Site - Used for project sites consisting of project members
- Department Site - Used for Academic and Administrative sites
11. Site Visibility - You can set the visibility options of your site.
12. Click Create your site button and start on your Site!

Note: There must be a notification that your site is created. Click Go there to view your website.

See Also


