
Draft:Create a New Page: Difference between revisions
No edit summary |
No edit summary |
||
| (3 intermediate revisions by the same user not shown) | |||
| Line 5: | Line 5: | ||
# Click Log in at the top right of the page.[[File:Login bar.png|alt=Login bar|frameless|1011x1011px]] | # Click Log in at the top right of the page.[[File:Login bar.png|alt=Login bar|frameless|1011x1011px]] | ||
# Use your UP Mail ''(username@up.edu.ph)'' to sign in.<br />[[File:Google sign in.png|alt=Sign in using up mail|frameless| | # Use your UP Mail ''(username@up.edu.ph)'' to sign in.<br />[[File:Google sign in.png|alt=Sign in using up mail|frameless|871x871px]] | ||
# Once logged in, you should see your username in the upper-right corner of the header bar.<br />*''Please note that your username defaults to your UP Mail address.''<br />[[File:Username headerbar.png|alt=username|frameless]] | # Once logged in, you should see your username in the upper-right corner of the header bar.<br />*''Please note that your username defaults to your UP Mail address.''<br />[[File:Username headerbar.png|alt=username|frameless|453x453px]] | ||
== Step 2: Create a New Page == | == Step 2: Create a New Page == | ||
# Enter the title of your proposed page in the search bar.<br />[[File:Search title.png|alt=Search bar|frameless| | # Enter the title of your proposed page in the search bar.<br />[[File:Search title.png|alt=Search bar|frameless|1020x1020px]] | ||
# Search for the title. | # Search for the title. | ||
# If the page does not exist, look for an option such as '''Create the page.'''<br />[[File:Unique page-whole.png|alt=Create Page|frameless| | # If the page does not exist, look for an option such as '''Create the page.'''<br />[[File:Unique page-whole.png|alt=Create Page|frameless|1010x1010px|border]] | ||
# Click on the title of your proposed page to open the editor.<br />[[File:Unique page-zoom.png|alt=Title of your page|frameless| | # Click on the title of your proposed page to open the editor.<br />[[File:Unique page-zoom.png|alt=Title of your page|frameless|639x639px|border]] | ||
== Step 3: Choose your Editing mode == | == Step 3: Choose your Editing mode == | ||
# Once you clicked on your page title, you will be directed to the page editor.<br />[[File:Page editor.png|alt=Page editor|frameless| | # Once you clicked on your page title, you will be directed to the page editor.<br />[[File:Page editor.png|alt=Page editor|frameless|792x792px|border]] | ||
# By default, Iskomunidad uses the '''VisualEditor''', which is recommended for beginners because it works similarly to a word processor (like Microsoft Word). You can simply type and format text directly, apply headings, format text, lists, and insert links, images, and tables through the toolbar options.<br />[[File:Editing modes.png|alt=editing modes|frameless]] | # By default, Iskomunidad uses the '''VisualEditor''', which is recommended for beginners because it works similarly to a word processor (like Microsoft Word). You can simply type and format text directly, apply headings, format text, lists, and insert links, images, and tables through the toolbar options.<br />[[File:Editing modes.png|alt=editing modes|frameless|495x495px|border]] | ||
#* Visual editor - Best for beginners who prefers a simple, user-friendly editing experience with visual formatting tools.<br />[[File:Visual Editor.png|alt=Visual Editor|frameless| | #* Visual editor - Best for beginners who prefers a simple, user-friendly editing experience with visual formatting tools.<br />[[File:Visual Editor.png|alt=Visual Editor|frameless|922x922px|border]] | ||
#* Source editing - ideal for users who need greater control over page's markup. This mode allows you to enter wiki syntax manually, use templates and categories, and add supported HTML or extension-specific markup.<br />[[File:Source editor.png|alt=Source Editor|frameless| | #* Source editing - ideal for users who need greater control over page's markup. This mode allows you to enter wiki syntax manually, use templates and categories, and add supported HTML or extension-specific markup.<br />[[File:Source editor.png|alt=Source Editor|frameless|850x850px|border]] | ||
==Ready to Create Your Page?== | |||
<br/><br/> | |||
<div style="text-align:center; margin:30px 0;"><!-- ===== Page protection reminder ===== --> | |||
<div class="protect-box" style="background:#d9d9d9; padding:20px 25px; margin:20px 0; display:flex; flex-wrap:wrap; gap:25px; align-items:center; text-align:left;"> | |||
<div class="protect-text" style="flex:1 1 40%; min-width:260px; font-size:90%; line-height:1.4; text-align:left;"> | |||
<div style="font-weight:600; font-size:115%; margin-bottom:8px;">Page protection reminder</div> | |||
When creating or editing an article, please use the Change Protection setting that best matches the type and purpose of your page.<br /> | |||
You may choose from the following protection levels: | |||
* '''Allow all users''' – Anyone can edit the page. This is the default setting. | |||
* '''Protect from non-authors''' – Only the original author and users with appropriate permissions can edit the page. | |||
* '''Allow only autoconfirmed users''' – Only established, autoconfirmed accounts can edit the page. | |||
* '''Allow only administrators''' – Editing is restricted to administrators. | |||
Important: If you do not select a protection level, the page will automatically be set to Allow all users.<br /> | |||
Please choose the protection level appropriate for your article. Avoid applying unnecessary restrictions so that Iskomunidad remains open and collaborative while protecting pages that require additional control.<br /> | |||
Thank you for helping keep Iskomunidad organized and collaborative! | |||
</div> | |||
<div class="protect-images" style="flex:1 1 50%; min-width:0; display:flex; gap:15px; align-items:flex-start;"> | |||
<div class="fluid-img" style="flex:1 1 0; min-width:0;">[[File:Tool Box.png|frameless|500px]]</div> | |||
<div class="fluid-img" style="flex:1 1 0; min-width:0;">[[File:Protect.png|frameless|500px]]</div> | |||
</div> | |||
</div><!-- end protect-box --> | |||
Latest revision as of 07:55, 9 October 2026
How to Create a New Page
This tutorial covers the process in creating a page to formatting its contents, adding images and links, and publishing the finished page. It assumes that users can log in and have permission to create or edit pages.
Step 1: Log in to the Website
- Click Log in at the top right of the page.

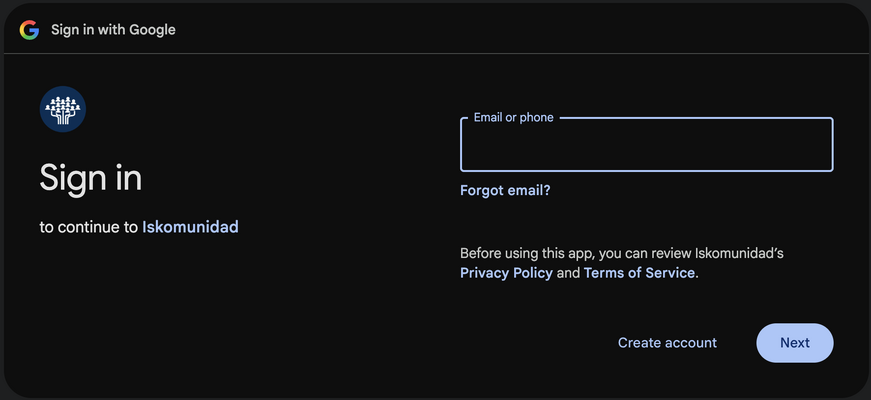
- Use your UP Mail (username@up.edu.ph) to sign in.
- Once logged in, you should see your username in the upper-right corner of the header bar.
*Please note that your username defaults to your UP Mail address.


Step 2: Create a New Page
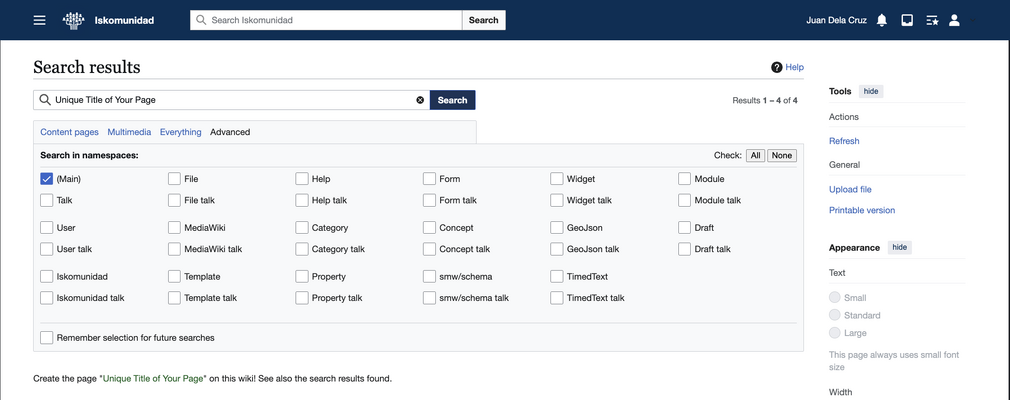
- Enter the title of your proposed page in the search bar.

- Search for the title.
- If the page does not exist, look for an option such as Create the page.
- Click on the title of your proposed page to open the editor.



Step 3: Choose your Editing mode
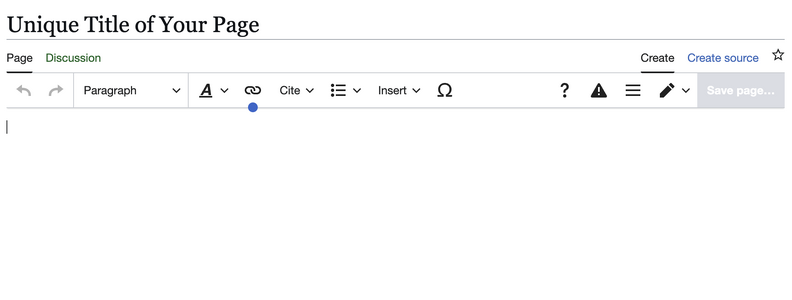
- Once you clicked on your page title, you will be directed to the page editor.
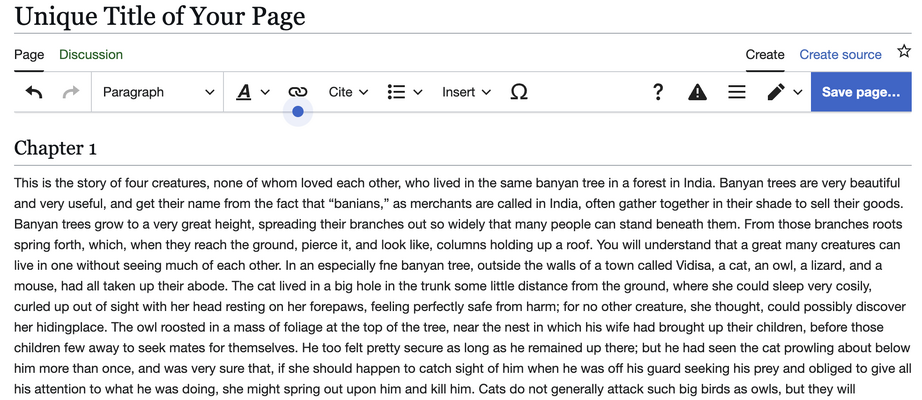
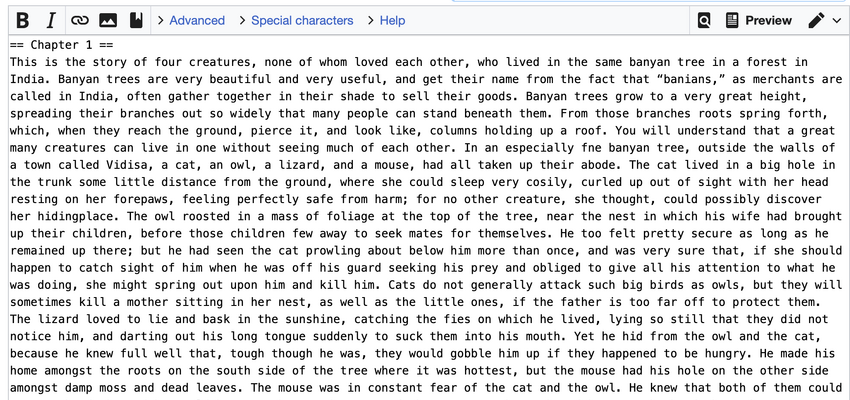
- By default, Iskomunidad uses the VisualEditor, which is recommended for beginners because it works similarly to a word processor (like Microsoft Word). You can simply type and format text directly, apply headings, format text, lists, and insert links, images, and tables through the toolbar options.
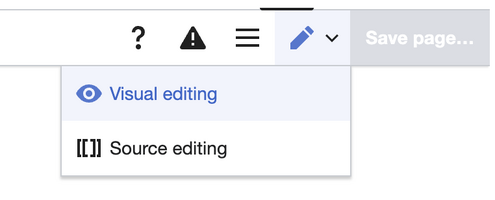
- Visual editor - Best for beginners who prefers a simple, user-friendly editing experience with visual formatting tools.
- Source editing - ideal for users who need greater control over page's markup. This mode allows you to enter wiki syntax manually, use templates and categories, and add supported HTML or extension-specific markup.
- Visual editor - Best for beginners who prefers a simple, user-friendly editing experience with visual formatting tools.


Ready to Create Your Page?
When creating or editing an article, please use the Change Protection setting that best matches the type and purpose of your page.
You may choose from the following protection levels:
- Allow all users – Anyone can edit the page. This is the default setting.
- Protect from non-authors – Only the original author and users with appropriate permissions can edit the page.
- Allow only autoconfirmed users – Only established, autoconfirmed accounts can edit the page.
- Allow only administrators – Editing is restricted to administrators.
Important: If you do not select a protection level, the page will automatically be set to Allow all users.
Please choose the protection level appropriate for your article. Avoid applying unnecessary restrictions so that Iskomunidad remains open and collaborative while protecting pages that require additional control.
Thank you for helping keep Iskomunidad organized and collaborative!

